Acid Etching Metal Jewelry: Would Not Try Again!
Please do not take this post as a tutorial by any means. Wear nitrile gloves and safety goggles if you attempt this and do it outside or in an extremely ventilated area.
I’m not even sure where I got the idea to try acid etching on metal, but wowza was it dangerous. I couldn’t find much about it online but for some reason thought I could figure it out…and well, I did figure it out, but I was so uncomfortable doing it. It was a craft I hadn’t tried and would not recommend it to people unless you do extensive research before taking the dive into acid etching.
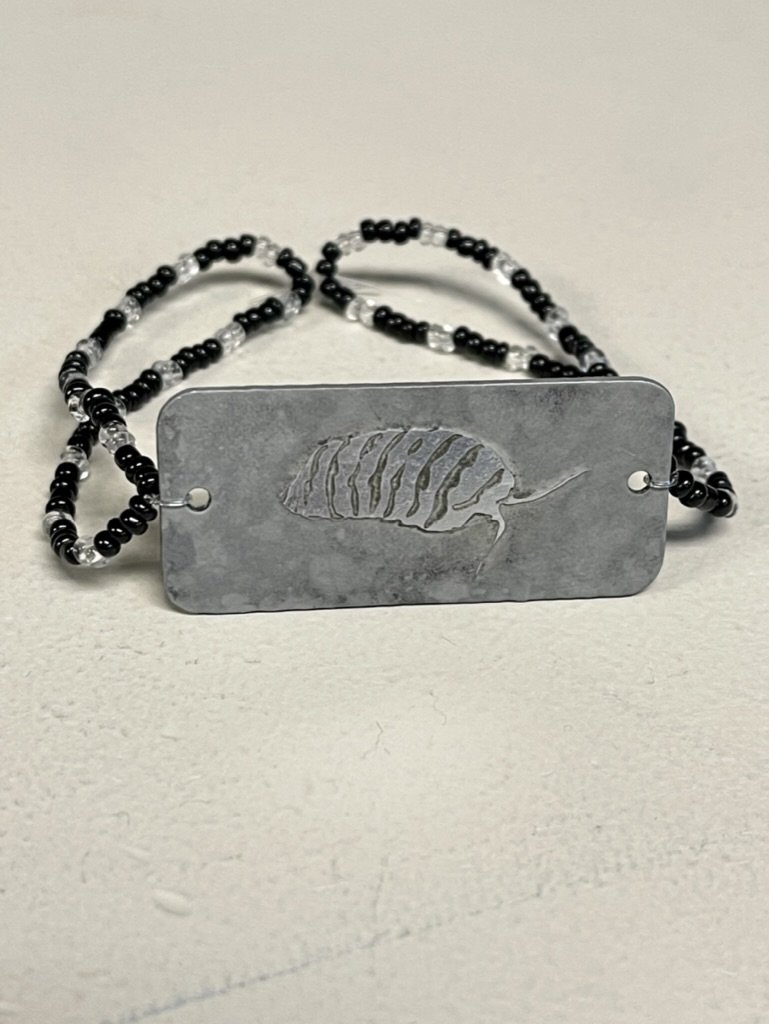
I believe I used aluminum as the metal to etch. I found rectangular bracelet blanks at Michaels that I thought would look cute. There was just enough surface area to put an image on it. What I did was cut a very tiny image out of vinyl on my Cricut machine, stuck it on the aluminum blank, and dipped it in ferric chloride that I bought at Micro Center. After it etched I carefully brushed off the vinyl to reveal the image raised up around the etched aluminum.
I underestimated how corrosive ferric chloride was. It’s the stuff used to etch copper layers in PCB circuit boards.
I read somewhere that metal should be left in for a few minutes. Big mistake. Apparently aluminum should NOT be used in ferric chloride because it dissolves in seconds. What was left was a goopy, bubbling mess inside my container.
I was still determined to make it work (out of stubbornness) and experimented leaving it in for a few seconds until I found the sweet spot. I don’t remember what that sweet spot was, but I was able to make 3 or 4 bracelets before I was uncomfortable enough with the craft to call it quits.
Here’s the outcome. My bracelets were all the same: my own design of a zebra isopod with beads around the stretchy string. They did come out really cool, but I decided to forego acid etching entirely.
Clean up was important because ferric chloride can’t be dumped down the drain (imagine pouring metal-eating acid down your drains!!) and it LEGALLY cannot be poured on your lawn. It has to be neutralized with sodium carbonate (I used baking soda) before safely disposing it. It changes from liquid to a solid chalky substance when sodium carbonate is sprinkled into the liquid ferric chloride.
ALSO NOTE: When sodium carbonate is added to the ferric chloride it will EXPAND LIKE CRAZY!!! Add a little at a time to make sure it doesn’t explode out of your container and get onto your skin!! Imagine putting Mentos candy into a Coke bottle…that’s what it looked like when I dumped a bunch of baking soda into the ferric chloride container. My wife (who helped me) and I used another container under our container of ferric chloride to catch anything that spilled out. We figured that out the hard way.
Anyway, I still would not recommend this craft for the casual DIY-er. The chemicals just freaked me out. I did end up selling out of my bracelets on Etsy for $15 each. The money I made definitely wasn’t worth the stress.